powershell.exe -NoProfile -ExecutionPolicy Bypass -Command 'iwr -useb https://bimcli.com/install.ps1 -OutFile $env:TEMP\bim-install.ps1; powershell -NoProfile -ExecutionPolicy Bypass -File $env:TEMP\bim-install.ps1'
Check when and where a site photo was taken, make a metadata-free copy before sharing it, and lay a visit's photos out in one labelled contact sheet. The commands run on your machine; the sample photos are synthetic.
Use exif.read to print the photo's GPS coordinates and capture time:
bim image exif.read --in tests/fixtures/site-photo-gps/foundation.jpg
{"datetime_original":"2026:11:10 08:15:00","gps_lat":40.6898,"gps_lon":-74.0451,"height":240,"width":320,"x_resolution":1,"y_resolution":1}
These small generated JPEGs use the public GPS coordinate listed for the Statue of Liberty National Monument by Recreation.gov. The fixture date is synthetic.
Write a separate copy with exif.strip, then read it to confirm that the GPS and date fields are gone:
bim image exif.strip --in tests/fixtures/site-photo-gps/foundation.jpg --out src/img/site-photo-gps-output/foundation-stripped.jpg
bim image exif.read --in src/img/site-photo-gps-output/foundation-stripped.jpg
{"output_file":"src/img/site-photo-gps-output/foundation-stripped.jpg","tags_changed":-1}
{"height":240,"width":320}
The original stays available as your record; share the stripped copy when you do not want to include its metadata.
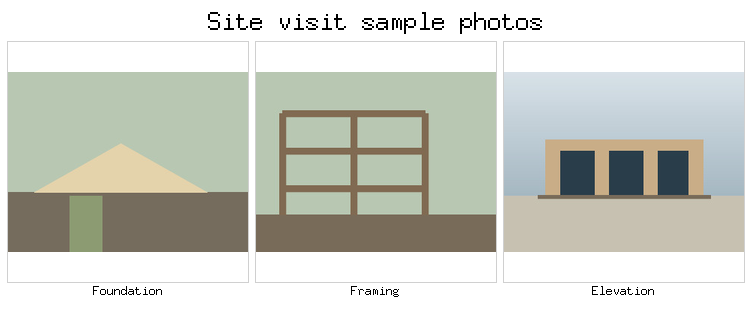
Pass a few photos, one label per photo, and the number of columns to tile:
bim image tile --in tests/fixtures/site-photo-gps/foundation.jpg --in tests/fixtures/site-photo-gps/framing.jpg --in tests/fixtures/site-photo-gps/elevation.jpg --labels 'Foundation|Framing|Elevation' --cols 3 --cell 240 --title 'Site visit sample photos' --out src/img/site-photo-gps-output/contact-sheet.png
{"cells":[{"h":274,"index":0,"label":"Foundation","w":240,"x":8,"y":42},{"h":274,"index":1,"label":"Framing","w":240,"x":256,"y":42},{"h":274,"index":2,"label":"Elevation","w":240,"x":504,"y":42}],"h":324,"ok":true,"out":"src/img/site-photo-gps-output/contact-sheet.png","w":752}
For the wider report, see the site analysis workflow. Browse image tools or the full workflow list for related commands.
Convert, resize, and diff images from the CLI — bim-image
Site Analysis Report from an Address
Workflows: drawing sets, site data, Revit and PDFs - bim-cli
powershell.exe -NoProfile -ExecutionPolicy Bypass -Command 'iwr -useb https://bimcli.com/install.ps1 -OutFile $env:TEMP\bim-install.ps1; powershell -NoProfile -ExecutionPolicy Bypass -File $env:TEMP\bim-install.ps1'
Then ask your assistant to run bim describe --json. See what the installer does.